The Chatbot In Python improves customer experience by streamlining interactions between individuals and services.
At the same time, by lowering the normal cost of customer support, they provide firms with new options to boost customer engagement and operational efficiency.
Project Details and Technology
| Project Name: | Chatbot In Python With Source Code |
| Abstract | A chatbot is a computer program that simulates human conversation through voice commands or text chats or both. |
| Language/s Used: | Python (GUI Based) |
| Python version (Recommended): | 3.8 or 3.9 |
| Database: | None |
| Type: | Desktop Application |
| Developer: | Source Code Hero |
| Updates: | 0 |
About The Chatbot in Python
The Chatbot Project In Python is written in the Python programming language, and it will show you how to code a chatbot in Python.
A Chatbot Python is a piece of intelligent software that can communicate and conduct tasks in the same way that a human can. Customer interaction, social media marketing, and instant messaging are all common uses for chatbots in the Python Project Report.
Prerequisite
The project requires you to have good knowledge of Python, Keras, and Natural language processing (NLTK).
Along with them, we will use some helping modules which you can download using the python-pip command.
How To Make A chatbot In Python?
Now we are going to build the chatbot using Python but first, let us see the file structure and the type of files we will be creating:
- Intents.json – The data file which has predefined patterns and responses.
- train_chatbot.py – In this Python file, we wrote a script to build the model and train our chatbot.
- Words.pkl – This is a pickle file in which we store the words Python object that contains a list of our vocabulary.
- Classes.pkl – The classes pickle file contains the list of categories.
- Chatbot_model.h5 – This is the trained model that contains information about the model and has weights of the neurons.
- Chatgui.py – This is the Python script in which we implemented GUI for our chatbot. Users can easily interact with the bot.
Here are the 5 steps to create a chatbot in Python from scratch:
- Import and load the data file
- Preprocess data
- Create training and testing data
- Build the model
- Predict the response
1. Import and load the data file
First, make a file name train_chatbot.py. We import the necessary packages for our chatbot and initialize the variables we will use in our Python project.
The data file is in JSON format so we used the json package to parse the JSON file into Python.
import nltk
from nltk.stem import WordNetLemmatizer
lemmatizer = WordNetLemmatizer()
import json
import pickle
import numpy as np
from keras.models import Sequential
from keras.layers import Dense, Activation, Dropout
from keras.optimizers import SGD
from tensorflow.keras.optimizers import SGD
import random
words=[]
classes = []
documents = []
ignore_words = ['?', '!']
data_file = open('intents.json').read()
intents = json.loads(data_file)
2. Preprocess data
When working with text data, we need to perform various preprocessing on the data before we make a machine learning or a deep learning model. Based on the requirements we need to apply various operations to preprocess the data.
Tokenizing is the most basic and first thing you can do on text data. Tokenizing is the process of breaking the whole text into small parts like words.
Here we iterate through the patterns and tokenize the sentence using nltk.word_tokenize() function and append each word in the words list. We also create a list of classes for our tags.
for intent in intents['intents']:
    for pattern in intent['patterns']:
        #tokenize each word
        w = nltk.word_tokenize(pattern)
        words.extend(w)
        #add documents in the corpus
        documents.append((w, intent['tag']))
        # add to our classes list
        if intent['tag'] not in classes:
            classes.append(intent['tag'])
Now we will lemmatize each word and remove duplicate words from the list. Lemmatizing is the process of converting a word into its lemma form and then creating a pickle file to store the Python objects which we will use while predicting.
# lemmatize, lower each word and remove duplicates
words = [lemmatizer.lemmatize(w.lower()) for w in words if w not in ignore_words]
words = sorted(list(set(words)))
# sort classes
classes = sorted(list(set(classes)))
# documents = combination between patterns and intents
print (len(documents), "documents")
# classes = intents
print (len(classes), "classes", classes)
# words = all words, vocabulary
print (len(words), "unique lemmatized words", words)
pickle.dump(words,open('words.pkl','wb'))
pickle.dump(classes,open('classes.pkl','wb'))
3. Create training and testing data
Now, we will create the training data in which we will provide the input and the output. Our input will be the pattern and output will be the class our input pattern belongs to. But the computer doesn’t understand text so we will convert text into numbers.
# create our training data
training = []
# create an empty array for our output
output_empty = [0] * len(classes)
# training set, bag of words for each sentence
for doc in documents:
    # initialize our bag of words
    bag = []
    # list of tokenized words for the pattern
    pattern_words = doc[0]
    # lemmatize each word - create base word, in attempt to represent related words
    pattern_words = [lemmatizer.lemmatize(word.lower()) for word in pattern_words]
    # create our bag of words array with 1, if word match found in current pattern
    for w in words:
        bag.append(1) if w in pattern_words else bag.append(0)
    # output is a '0' for each tag and '1' for current tag (for each pattern)
    output_row = list(output_empty)
    output_row[classes.index(doc[1])] = 1
    training.append([bag, output_row])
# shuffle our features and turn into np.array
random.shuffle(training)
training = np.array(training)
# create train and test lists. X - patterns, Y - intents
train_x = list(training[:,0])
train_y = list(training[:,1])
print("Training data created")
4. Build the model
We have our training data ready, now we will build a deep neural network that has 3 layers. We use the Keras sequential API for this. After training the model for 200 epochs, we achieved 100% accuracy on our model. Let us save the model as ‘chatbot_model.h5’.
# Create model - 3 layers. First layer 128 neurons, second layer 64 neurons and 3rd output layer contains number of neurons
# equal to number of intents to predict output intent with softmax
model = Sequential()
model.add(Dense(128, input_shape=(len(train_x[0]),), activation='relu'))
model.add(Dropout(0.5))
model.add(Dense(64, activation='relu'))
model.add(Dropout(0.5))
model.add(Dense(len(train_y[0]), activation='softmax'))
# Compile model. Stochastic gradient descent with Nesterov accelerated gradient gives good results for this model
sgd = SGD(lr=0.01, decay=1e-6, momentum=0.9, nesterov=True)
model.compile(loss='categorical_crossentropy', optimizer=sgd, metrics=['accuracy'])
#fitting and saving the model
hist = model.fit(np.array(train_x), np.array(train_y), epochs=200, batch_size=5, verbose=1)
model.save('chatbot_model.h5', hist)
print("model created")
5. Predict the response (Graphical User Interface)
To predict the sentences and get a response from the user to let us create a new file ‘chatapp.py’.
We will load the trained model and then use a graphical user interface that will predict the response from the bot. The model will only tell us the class it belongs to, so we will implement some functions which will identify the class and then retrieve us a random response from the list of responses.
Again we import the necessary packages and load the ‘words.pkl’ and ‘classes.pkl’ pickle files which we have created when we trained our model:
import nltk
from nltk.stem import WordNetLemmatizer
lemmatizer = WordNetLemmatizer()
import pickle
import numpy as np
from keras.models import load_model
model = load_model('chatbot_model.h5')
import json
import random
intents = json.loads(open('intents.json').read())
words = pickle.load(open('words.pkl','rb'))
classes = pickle.load(open('classes.pkl','rb'))
To predict the class, we will need to provide input in the same way as we did while training. So we will create some functions that will perform text preprocessing and then predict the class.
def clean_up_sentence(sentence):
    # tokenize the pattern - split words into array
    sentence_words = nltk.word_tokenize(sentence)
    # stem each word - create short form for word
    sentence_words = [lemmatizer.lemmatize(word.lower()) for word in sentence_words]
    return sentence_words
# return bag of words array: 0 or 1 for each word in the bag that exists in the sentence
def bow(sentence, words, show_details=True):
    # tokenize the pattern
    sentence_words = clean_up_sentence(sentence)
    # bag of words - matrix of N words, vocabulary matrix
    bag = [0]*len(words)
    for s in sentence_words:
        for i,w in enumerate(words):
            if w == s:
                # assign 1 if current word is in the vocabulary position
                bag[i] = 1
                if show_details:
                    print ("found in bag: %s" % w)
    return(np.array(bag))
def predict_class(sentence, model):
    # filter out predictions below a threshold
    p = bow(sentence, words,show_details=False)
    res = model.predict(np.array([p]))[0]
    ERROR_THRESHOLD = 0.25
    results = [[i,r] for i,r in enumerate(res) if r>ERROR_THRESHOLD]
    # sort by strength of probability
    results.sort(key=lambda x: x[1], reverse=True)
    return_list = []
    for r in results:
        return_list.append({"intent": classes[r[0]], "probability": str(r[1])})
    return return_list
After predicting the class, we will get a random response from the list of intents.
def getResponse(ints, intents_json):
    tag = ints[0]['intent']
    list_of_intents = intents_json['intents']
    for i in list_of_intents:
        if(i['tag']== tag):
            result = random.choice(i['responses'])
            break
    return result
def chatbot_response(text):
    ints = predict_class(text, model)
    res = getResponse(ints, intents)
    return res
Now we will develop a graphical user interface. Let’s use Tkinter library which is shipped with tons of useful libraries for GUI. We will take the input message from the user and then use the helper functions we have created to get the response from the bot and display it on the GUI. Here is the full source code for the GUI.
#Creating GUI with tkinter
import tkinter
from tkinter import *
def send():
    msg = EntryBox.get("1.0",'end-1c').strip()
    EntryBox.delete("0.0",END)
    if msg != '':
        ChatLog.config(state=NORMAL)
        ChatLog.insert(END, "You: " + msg + '\n\n')
        ChatLog.config(foreground="#442265", font=("Verdana", 12 ))
        res = chatbot_response(msg)
        ChatLog.insert(END, "Bot: " + res + '\n\n')
        ChatLog.config(state=DISABLED)
        ChatLog.yview(END)
base = Tk()
base.title("Hello")
base.geometry("400x500")
base.resizable(width=FALSE, height=FALSE)
#Create Chat window
ChatLog = Text(base, bd=0, bg="white", height="8", width="50", font="Arial",)
ChatLog.config(state=DISABLED)
#Bind scrollbar to Chat window
scrollbar = Scrollbar(base, command=ChatLog.yview, cursor="heart")
ChatLog['yscrollcommand'] = scrollbar.set
#Create Button to send message
SendButton = Button(base, font=("Verdana",12,'bold'), text="Send", width="12", height=5,
                    bd=0, bg="#32de97", activebackground="#3c9d9b",fg='#ffffff',
                    command= send )
#Create the box to enter message
EntryBox = Text(base, bd=0, bg="white",width="29", height="5", font="Arial")
#EntryBox.bind("<Return>", send)
#Place all components on the screen
scrollbar.place(x=376,y=6, height=386)
ChatLog.place(x=6,y=6, height=386, width=370)
EntryBox.place(x=128, y=401, height=90, width=265)
SendButton.place(x=6, y=401, height=90)
base.mainloop()
6. Run the chatbot
To run the chatbot, we have two main files; train_chatbot.py and chatapp.py.
First, we train the model using the command in the terminal:
python train_chatbot.py
If we don’t see any error during training, we have successfully created the model. Then to run the app, we run the second file.
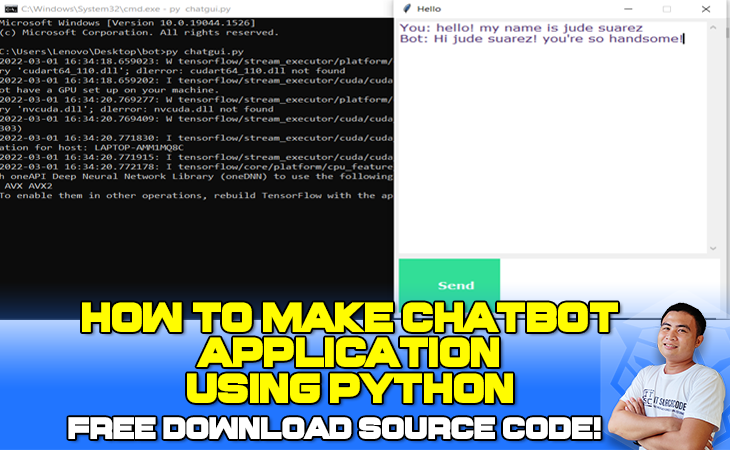
python chatgui.py
The program will open up a GUI window within a few seconds. With the GUI you can easily chat with the bot.
Project output:

Major Functionalities Of The System
- Conversation Between User and Bot
- Interaction Between User and Bot
Download the Source Code below
Summary
This article is a way to enhance and develop our skills and logic ideas which is important in practicing the Python programming language which is the most well-known and most usable programming language in many companies.
When I run the program it’s just opening GUI window and nothing else…
The chatbot is not responding like it’s empty on GUI window. Can you suggest to us how to solve this problem?
My Email- [email protected]
Thank you for your source code, it helps me a lot if you solve this issue.
When I run the program it’s just opening GUI window and nothing else…
The chatbot is not responding like it’s empty on GUI window. Can you suggest to us how to solve this problem?
Good evening guys…
I am a beginner in AI, I would like to run this code and test it can any body please guide me how to upload it and run it using jupiter.
any help will be appreciate it.
can you tme pls i want to start to develope chat bot for customer