
In this article, we will discuss how to make a text editor in JavaScript.
The Text Editor in JavaScript is created to help students, developers, and professionals enhance their knowledge in the development of this project so that they can build their own Text Editor.
This Text Editor is created using JavaScript (JS) as the main structure of the program and (HTML and CSS) for the front end.
What is Text Editor JavaScript?
In JavaScript, Text Editor is a simple program that provides basic functions to help developers build their very own unique Online Text Editor using JavaScript (JS).
In addition, this Text Editor allows users to enter, store, change, and print text to a browser, each encoded data into this Editor will provide an Input and Output so that they become useful computer programs that serve as a learning curve.
Importance of text editor JavaScript?
This Text Editor in JavaScript are really important because this will served as your guide to create your own Text Editor in the future.
Furthermore, we all know that Text Editors are superior in terms of writing codes, using Text Editor we can create a small to bigger projects that is useful to many business and companies or even government offices.
Without further ado I will provide a free source code as well a downloadable file to served as your guide to develop your own Text Editor Using JavaScript (JS).
Code Explanation: The HTML code adds a different button which help to click in the Text Editor. This buttons performs a different tasks to access the JavaScript code.
The buttons have a different functions that is useful for the user experience of the user. This buttons can change the font-weight of the string input by the user, font-style, alignment of the string and can transform different string using an (Object Model).
Furthermore, I also added some CSS or (Cascading Style Sheet) to simplify and beautify the interface of the Text Editor for editor content.
Lastly, We added only one Text Field where users can write there like to be output.
index.html:
<!DOCTYPE html>

<html lang="en" dir="ltr">

<head>

	<meta charset="utf-8">

	<title>Text Editor</title>

	<!--Bootstrap Cdn -->

	<link rel="stylesheet"

		href=

"https://cdn.jsdelivr.net/npm/[email protected]/dist/css/bootstrap.min.css"

		integrity=

"sha384-TX8t27EcRE3e/ihU7zmQxVncDAy5uIKz4rEkgIXeMed4M0jlfIDPvg6uqKI2xXr2"

		crossorigin="anonymous">

	<!-- fontawesome cdn For Icons -->

	<link rel="stylesheet"

		href=

"https://cdnjs.cloudflare.com/ajax/libs/font-awesome/5.10.0/css/all.min.css"

		integrity=

"sha512-PgQMlq+nqFLV4ylk1gwUOgm6CtIIXkKwaIHp/PAIWHzig/lKZSEGKEysh0TCVbHJXCLN7WetD8TFecIky75ZfQ=="

		crossorigin="anonymous" />

	<link rel="stylesheet"

		href=

"https://pro.fontawesome.com/releases/v5.10.0/css/all.css"

		integrity=

"sha384-AYmEC3Yw5cVb3ZcuHtOA93w35dYTsvhLPVnYs9eStHfGJvOvKxVfELGroGkvsg+p"

		crossorigin="anonymous" />


	<!--Internal CSS start-->

	<style>

		h1 {

			padding-top: 40px;

			padding-bottom: 40px;

			text-align: center;

			color: #957dad;

			font-family: 'Montserrat', sans-serif;

		}


		section {

			padding: 5%;

			padding-top: 0;

			height: 100vh;

		}


		.side {

			margin-left: 0;

		}


		button {

			margin: 10px;

			border-color: #957dad !important;

			color: #888888 !important;

			margin-bottom: 25px;

		}


		button:hover {

			background-color: #fec8d8 !important;

		}


		textarea {

			padding: 3%;

			border-color: #957dad;

			border-width: thick;

		}


		.flex-box {

			display: flex;

			justify-content: center;

		}

	</style>

	<!--Internal CSS End-->

</head>

<!--Body start-->


<body>

	<section class="">

		<h1 class="shadow-sm">TEXT EDITOR</h1>

		<div class="flex-box">

			<div class="row">

				<div class="col">

					<!-- Adding different buttons for

						different functionality-->

					<!--onclick attribute is added to give

						button a work to do when it is clicked-->

					<button type="button"

							onclick="f1()"

							class=" shadow-sm btn btn-outline-secondary"

							data-toggle="tooltip"

							data-placement="top"

							title="Bold Text">

			Bold</button>

					<button type="button"

							onclick="f2()"

							class="shadow-sm btn btn-outline-success"

							data-toggle="tooltip"

							data-placement="top"

							title="Italic Text">

			Italic</button>

					<button type="button"

							onclick="f3()"

							class=" shadow-sm btn btn-outline-primary"

							data-toggle="tooltip"

							data-placement="top"

							title="Left Align">

			<i class="fas fa-align-left"></i></button>

					<button type="button"

							onclick="f4()"

							class="btn shadow-sm btn-outline-secondary"

							data-toggle="tooltip"

							data-placement="top"

							title="Center Align">

			<i class="fas fa-align-center"></i></button>

					<button type="button"

							onclick="f5()"

							class="btn shadow-sm btn-outline-primary"

							data-toggle="tooltip"

							data-placement="top"

							title="Right Align">

			<i class="fas fa-align-right"></i></button>

					<button type="button"

							onclick="f6()"

							class="btn shadow-sm btn-outline-secondary"

							data-toggle="tooltip"

							data-placement="top"

							title="Uppercase Text">

			Upper Case</button>

					<button type="button"

							onclick="f7()"

							class="btn shadow-sm btn-outline-primary"

							data-toggle="tooltip"

							data-placement="top"

							title="Lowercase Text">

			Lower Case</button>

					<button type="button"

							onclick="f8()"

							class="btn shadow-sm btn-outline-primary"

							data-toggle="tooltip"

							data-placement="top"

							title="Capitalize Text">

			Capitalize</button>

					<button type="button"

							onclick="f9()"

							class="btn shadow-sm btn-outline-primary side"

							data-toggle="tooltip"

							data-placement="top"

							title="Tooltip on top">

			Clear Text</button>

				</div>

			</div>

		</div>

		<br>

		<div class="row">

			<div class="col-md-3 col-sm-3">

			</div>

			<div class="col-md-6 col-sm-9">

				<div class="flex-box">

					<textarea id="textarea1"

							class="input shadow"

							name="name"

							rows="15"

							cols="100"

							placeholder="Your text here ">

					</textarea>

				</div>

			</div>

			<div class="col-md-3">

			</div>

		</div>

	</section>

	<br>

	<br>

	<h6 style="text-align:center;">Priyansh Jha 2021.</h6>


	<!--External JavaScript file-->

	<script src="home.js"></script>

</body>


</html>
home.js:
function f1() {

	//function to make the text bold using DOM method

	document.getElementById("textarea1").style.fontWeight = "bold";

}


function f2() {

	//function to make the text italic using DOM method

	document.getElementById("textarea1").style.fontStyle = "italic";

}


function f3() {

	//function to make the text alignment left using DOM method

	document.getElementById("textarea1").style.textAlign = "left";

}


function f4() {

	//function to make the text alignment center using DOM method

	document.getElementById("textarea1").style.textAlign = "center";

}


function f5() {

	//function to make the text alignment right using DOM method

	document.getElementById("textarea1").style.textAlign = "right";

}


function f6() {

	//function to make the text in Uppercase using DOM method

	document.getElementById("textarea1").style.textTransform = "uppercase";

}


function f7() {

	//function to make the text in Lowercase using DOM method

	document.getElementById("textarea1").style.textTransform = "lowercase";

}


function f8() {

	//function to make the text capitalize using DOM method

	document.getElementById("textarea1").style.textTransform = "capitalize";

}


function f9() {

	//function to make the text back to normal by removing all the methods applied

	//using DOM method

	document.getElementById("textarea1").style.fontWeight = "normal";

	document.getElementById("textarea1").style.textAlign = "left";

	document.getElementById("textarea1").style.fontStyle = "normal";

	document.getElementById("textarea1").style.textTransform = "capitalize";

	document.getElementById("textarea1").value = " ";

}
Code Explanation in JavaScript: We select an elements using (DOM), then we use a method called (document.getElementById) which select a element that is particular and after the element is selecting a specific using it’s ID name we can now manipulate CSS through JavaScript (JS).
Lastly, we created a function that makes everything back to normal position, where all the properties where discarded and applied using all the buttons we provided.
What is the benefit of using the best text editor for JavaScript?
The benefit of using this JavaScript Editor is that it allows you to create your web application system with the use of different browsers such as Google, Firefox, Brave, and Internet Explorer.
In addition, with the help of HTML, CSS and JavaScript the user interface can be more interactive and powerful which is better for user experience.
What is the Advantage of this system?
The number one advantage of using this Text Editor is that it is user-friendly and faster for writing a rich text editing program, that can be useful for updating and creating your simple projects and typically it is faster to make changes to a website.
How does a Rich Text Editor in JavaScript?
A Text Editor is an open-source computer program that allows a user to enter plain text in real-time, edit, save, and, in most cases, print text (characters and numbers, each encoded by the computer and its input and output devices, arranged to have meaning to users or to other programs).
how to create a WYSIWYG rich text editor in JavaScript?
- Install the JavaScript code for the editor.
- Make or change a Web form with one or more textarea elements.
- To convert the textarea element(s) into a WYSIWYG editor, add a short piece of JavaScript (s)
About the Project
Simple project for simple text editing. When it comes to the project itself, there are numerous features. A user has the ability to make notes and other instances.
Project Details and Technology
| Project Name: | Text Editor In Javascript With Source Code |
| Abstract | HTML5, CSS, canvas, and JavaScript are all used in the Javascript editor. The editor page is divided into two sections when it comes to the project’s features. On the left side of the editor page, the user can type any phrase, and the changes will show automatically on the right side. You can also make adjustments on the left side of the page and see the results right away on the right. |
| Language/s Used: | JavaScript |
| JavaScript version (Recommended): | ES2015 |
| Database: | N/A |
| Type: | Web Application |
| Developer: | Source Code Hero |
| Updates: | 0 |
Steps how to run the project
Time needed: 3 minutes
PROCEDURE
- Step 1: Download Source Code
To begin, locate the downloaded source code file below and click to begin the download process.

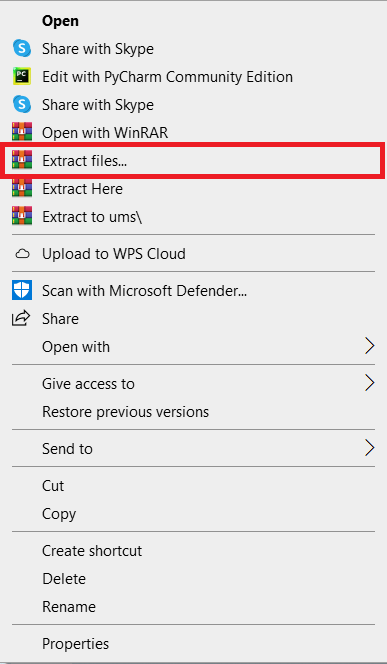
- Step 2: Extract File
When you’ve completed downloading the file, go to its location and right-click it to extract it.

- Step 3: Execute the system
To begin executing the project, double-click the index.html file inside the folder.
Download the Source Code below
Summary
This Text Editor In JavaScript is a fully functional project for Web developers interested in learning more about web apps.
Related Articles
- Text Editor In Java Project With Source Code
- Image Editor In PHP With Source Code
- Memory Game in JavaScript With Source Code
- Drawing a Circle In JavaScript With Source Code
Inquiries
Please leave a comment below if you have any questions or comments about the project.