Travel Management System Project in Django with Source Code
Travel Management System Project in Django with Source Code – This Django-based Travel Management System is a Python-based project.
We created a travel management system with Python, Django, and MySQL.
The booking module, which handles the booking functions, is the most important in this project.
Hotel reservations are normally handled by the travel agency module, while client features are handled by the customer module.
A Travel Management System in Python Django projects are popular topics for academic Python projects, as we all know.
As a result, we chose Python Django to build a travel management framework.
Project Details and Technology
This section offers details on the project and the technology that was utilized to create it.
The project’s name is Travel Management System Project in Django, and the programming language utilized is Python Django.
SOURCECODEHERO is the developer of this system, and the Python version used is 3.9. The database is SQLITE3, the application type is a web application, and the Python version used is 3.9.
| Project Name: | Travel Management System Project in Django with Source Code |
| Language/s Used: | Python Django |
| Python version (Recommended): | 3.9 |
| Database: | SQLlite3 |
| Type: | Web Application |
| Developer: | SOURCECODEHERO |
| Updates: | 0 |
To reduce human labor and boost efficiency, we implemented functionality for credit card payment, tour booking, and other duties in this project.
Beginners can learn how to develop a web-based Python Django project with the Travel Management System.
We will offer you the whole source code and database for the Python project so that you can quickly install it on your PC and begin learning Python Django programming.
What is a Travel Management System?
Travel management is a specialty that entails planning business travel, keeping track of various travel expenses, and developing a comprehensive travel strategy.
Its goal as a discipline is to assist organizations and their employees in better managing their travel demands.
What is the purpose of a Travel Management System?
Travel management is a company’s system for overseeing and facilitating business travel.
This encompasses the steps involved in organizing a trip, including reserving and paying for all necessary items, as well as the approvals and documentation required to assure compliance.
Who are the Beneficiaries of the Travel Management System?
The beneficiaries of the Travel management system can be used by travel agency companies and it is designed to assist organizations and their employees in better managing their travel demands.
Definition of terms of Travel Management System
- Travel Agency – is a company that acts as a go-between for the travel industry (provider) and the traveler (purchaser).
A travel agency’s function includes marketing pre-packaged travel packages and vacations to potential customers. - Travel Agent – is a traveller’s direct point of contact while researching and planning to buy packages and experiences through an agency.
Travel agencies can specialize in a variety of travel options, such as specific places, outdoor activities, backpacking, rail, cruise, bicycle, and gourmet tours, to mention a few.
Major Functionalities Used in Travel Management Systems in Django
Features of Travel Management System in Django on the admin side:
- Users Management – The admin can see a list of users and their details. The administrator has the ability to edit and delete the user’s information.
- Manage Package Details – The admin can see a list of package details for clients. Admin has the ability to edit and delete the Package Details record.
- Login – By default, the admin must first log in to gain access to the system.
- Manage Change Password – The admin can change a strong password for improved security in the system and to prevent hackers from gaining access to sensitive information.
Features of Travel Management System in Django on the user side:
- Home – The user can see information about packages in a certain location and amounts on the webpage.
- Manage Signup – In order to create an account, the user must first sign up.
- Login – After making an account, the user must first log in to gain access to the system.
- About Us – For the about us section, it’s all about the travel management system’s mission and vision.
- Booking Tour – A booking tour allows the customer to reserve a location such as a hotel or resort.
- Payment – The customer can pay with a credit card or through internet banking.
Before you start running an Online Crime Reporting System Project in Django, make sure you have a knowledge css, JavaScript, PHP, and Python.
Travel Management System in Django Steps on How to Create a Project
Time needed: 3 minutes
These are the steps to run a Travel Management System Project in Django
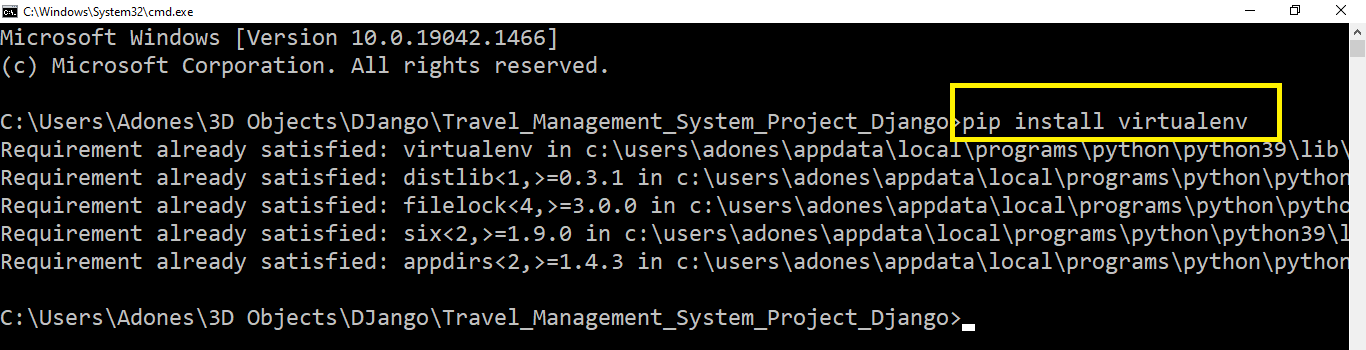
- pip install virtualenv
First, You need to install the virtualenv, Open a command prompt by going to the project folder directory and typing CMD. After opening the CMD type ” pip install virtualenv “.

- virtualenv env
Then, after installing virtualenv just type “virtualenv env” and enter. A virtual environment is a tool that creates separated python virtual environments for distinct projects to keep their dependencies separate. Most Python programmers utilize this as one of their most significant tools.

- cd env/Scripts
Next, type ” cd env/Scripts ” and press enter. It can be any script that includes data loading, processing, and cleaning, or any ML phase while developing an application when putting business logic directly in views or models isn’t always the best option.

- activate
Next, you need to type “activate” and then press enter.
The virtual environment will be turned on, and you’ll see “(project-name)” next to the command prompt to identify it.
You’ll have to activate the environment every time you open a new command prompt. - cd ../..
Next, type ” cd ../.. ” and press enter.
- Install Django
Next, type the command “pip install django”. This will download and install the most recent version of Django.
After the installation is complete, use the command prompt to check your Django installation by typing django-admin —version.
- python manage.py makemigrations
Next, after installing the Django type this command ” python manage.py makemigrations ” to create a table in the database.
Makemigrations provides SQL instructions for preinstalled applications (which can be seen in installed apps in settings.py) and your newly generated apps’ model, which you may add to installed apps.
Those commands in your database file are not executed. As a result, no tables are created after makemigrations.
- python manage.py migrate –run-syncdb
Next, after making migrations type this command ” python manage.py migrate –run-syncdb ” to migrate the tables in the database.
Initial database tables (including auth, auth group permission, Django admin log, and others) will not be generated if you don’t use syncdb before completing migration.
- python manage.py createsuperuser
After the migration of database you need to create a super user to login into the admin account, just you need to type the command ” python manage.py createsuperuser “.
Using manage.py, you may establish a “superuser” account with complete access to the site and all necessary permissions.
To create the superuser, run the following script in the same directory as manage.py. You’ll be asked to create a username, email address, and a secure password.
- python manage.py runserver
Lastly, after creating a super user just type the command ” python manage.py runserver “.
It should only be used for testing and launching your project; it should not be utilized for live website deployment.
The runserver management command is designed for purposes other than running a web server. The development server automatically reloads Python code for each request as needed, which is ideal for local development but would add extra overhead in a production setting (source):
- http://127.0.0.1:8000/
Finally, to access your project dashboard, type or copy this “http://127.0.0.1:8000/” into your browser.
It is possible to imitate a web-server environment with localhost, and it is most commonly used to simulate web applications operating on a web server.
The port number on which the browser communicates to the server is 8000.


Download Source Code Here!
Conclusion
To summarize, students and professionals interested in learning the Python Django programming language will find this Travel Management System Project in Django with Source Code useful.
This project can be customized to your exact requirements. I hope you find this assignment useful in honing your skills.
This is how you create a Travel Management System in Python Django. You can always try new approaches to implement the Online Crime Reporting System in Django in your Django projects.
This Mini Project for a Travel Management System Project in Django is available for free download and use strictly for educational purposes. It’s easy to grasp and use.
Related Articles
- Travel Management System Project In Java With Source Code
- Tourism Management System Project in C with Source Code
Inquiries
If you have any questions or suggestions about the Travel Management System Project in Django with Source Code, please feel free to leave a comment below.
I have this error when I am at the 7 step :” from django.conf.urls import url,include
ImportError: cannot import name ‘url’ from ‘django.conf.urls’ (C:\Users\User\Desktop\Travel_Management_System_Project_Django\env\lib\site-packages\django\conf\urls\__init__.py)”
Can you help me, please!?