Gym Management System using Django with Source Code – This Django Gym Management System Project was built using Python, Django, and a MySQL database.
On the backend, the Python Django Framework was used, and on the frontend, HTML, CSS, and JavaScript were used.
It offers an admin side with functionality such as managing members, payments, inquiries, plans, about us, and contacting us.
Django-based gym management system that tracks all equipment, plans, inquiries, and members. All of the crud (create, read, update, and delete) activities for members, equipment, plans, and inquiries have been completed.
This is a role-based module that allows the administrator to do anything with the data.
Project Details and Technology: Gym Management System using Django
This section covers details about the project as well as the technologies used by the system.
The project’s name is Django Gym Management System, and the programming language utilized is Python Django. The creator is SOURCECODEHERO, and the Python version used is 3.9.
The database is SQLITE3, the application is a web app, and the Python version is 3.9.
| Project Name: | Gym Management System in Django with Source Code |
| Language/s Used: | Python Django |
| Python version (Recommended): | 3.9 |
| Database: | SQLlite3 |
| Type: | Web Application |
| Developer: | SOURCECODEHERO |
| Updates: | 0 |
Introduction: Gym Management System using Django
Our Gym Management Software is a membership management system for gyms and health clubs.
You can keep track of your members and their memberships, as well as communicate with them quickly and easily.
Gym Management also contains a booking system, point of sale, finance, accounting, concessions, and a number of reports to assist with club management.
It is developed for gyms, recreation centers, and health clubs.
Our Gym Management Software is a complete gym and recreation facility system application that manages all of your members, memberships, and activities.
Our gym management software has a number of features, including client data entry, and keeping track of all customer costs, plans, and physical fitness, all of which aid in providing high-quality service.
Objective: Gym Management System using Django
“The main goal of the project is to create software that makes data storage, data maintenance, and data retrieval for the gym as simple as possible.
“To store customer records, staff with privileges to access, modify, and delete records, and finally the service that the gym provides to its customers.
” (Also, only the staff has access to any database and can make the necessary changes if necessary.) “o Create simple)to)use software that effectively manages customer/staff relationships.
“To provide a user-friendly system that requires minimal user training and has much of the same features and functions as any Windows platform.
Limitation of Existing System: Gym Management System using Django
“The present system, such as Gym Master, is not as user-friendly as our suggested system, and communication with members is poor with the existing system because Gym Manager handles all of the data.”
Customers do not have full access to the Gym Center, and only the Gym Manager has all permissions.
“Today’s systems cannot take the difficulty out of finances and debt collection; they are time-consuming software that is difficult to install in operating systems.”
Installing existing software necessitates a large amount of RAM.
Existing gym management software is incapable of performing all of the tasks that a manager would expect, such as keeping track of machine maintenance and servicing data.
Proposed System: Gym Management System using Django
“The suggested system’s goal is to construct a system with improved facilities, and it can overcome all of the existing system’s constraints.”
“The method ensures sufficient security while also reducing manual labor.”
Major Functionalities Used in Gym Management System in Django
Features of Gym Management System in Django in admin side:
Login – By default, the admin must first log in to gain access to the system.
Manage Enquiry – The admin can add, update, and delete enquiry details for the enquiry.
Plan Management – The administrator has the ability to add, update, and delete plan information.
Manage equipment – The administrator can add, update, and delete information about the equipment.
Member Management – The admin can add, update, and delete member information for the member.
Before you begin working on a Gym Management System Project in Django with Source Code, make sure you are familiar with CSS, JavaScript, PHP, and Python.
Gym Management System in Django Steps on How to Create a Project
Time needed: 3 minutes
These are the steps to run a Gym Management System Project in Django
- pip install virtualenv
First, You need to install the virtualenv, Open a command prompt by going to the project folder directory and typing CMD. After opening the CMD type ” pip install virtualenv “.

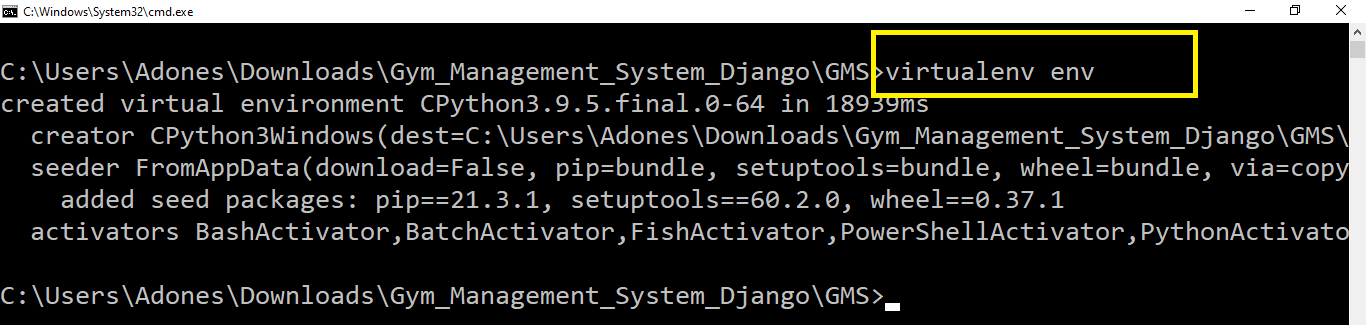
- virtualenv env
Then, after installing virtualenv just type “virtualenv env” and enter. A virtual environment is a tool that creates separate Python virtual environments for distinct projects to keep their dependencies separate.
Most Python programmers utilize this as one of their most significant tools.
- cd env/Scripts
Next, type ” cd env/Scripts ” and press enter. It can be any script that includes data loading, processing, and cleaning, or any ML phase while developing an application when putting business logic directly in views or models isn’t always the best option.

- activate
Next, you need to type “activate” and then press enter. The virtual environment will be turned on, and you’ll see “(project-name)” next to the command prompt to identify it.
You’ll have to activate the environment every time you open a new command prompt. - cd ../..
Next, just type ” cd ../.. ” and press enter.
- Install Django
Next, type the command “pip install django”. This will download and install the most recent version of Django.
After the installation is complete, use the command prompt to check your Django installation by typing django-admin —version.
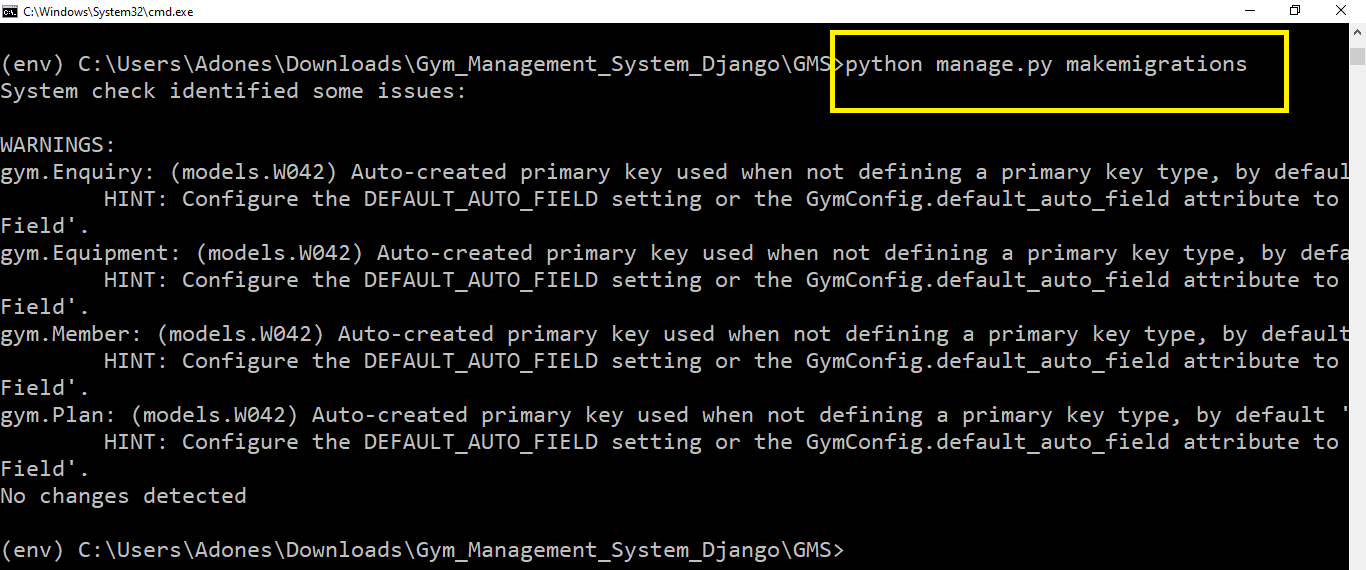
- python manage.py makemigrations
Next, after installing the Django type this command ” python manage.py makemigrations ” to create a table in the database.
Makemigrations provides SQL instructions for preinstalled applications (which can be seen in installed apps in settings.py) and your newly generated apps’ model, which you may add to installed apps. Those commands in your database file are not executed. As a result, no tables are created after makemigrations.
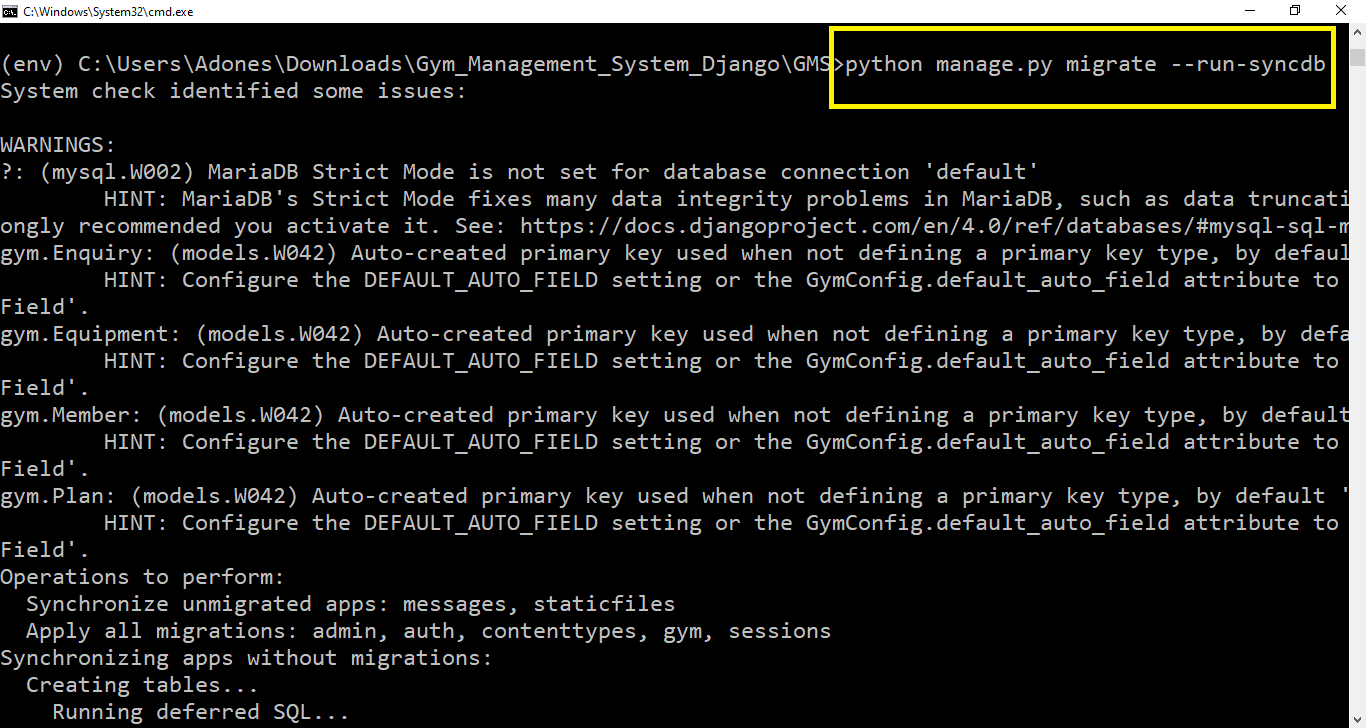
- python manage.py migrate –run-syncdb
Next, after making migrations type this command ” python manage.py migrate –run-syncdb ” to migrate the tables in database. Initial database tables (including auth, auth group permission, django admin log, and others) will not be generated if you don’t use syncdb before completing migration.

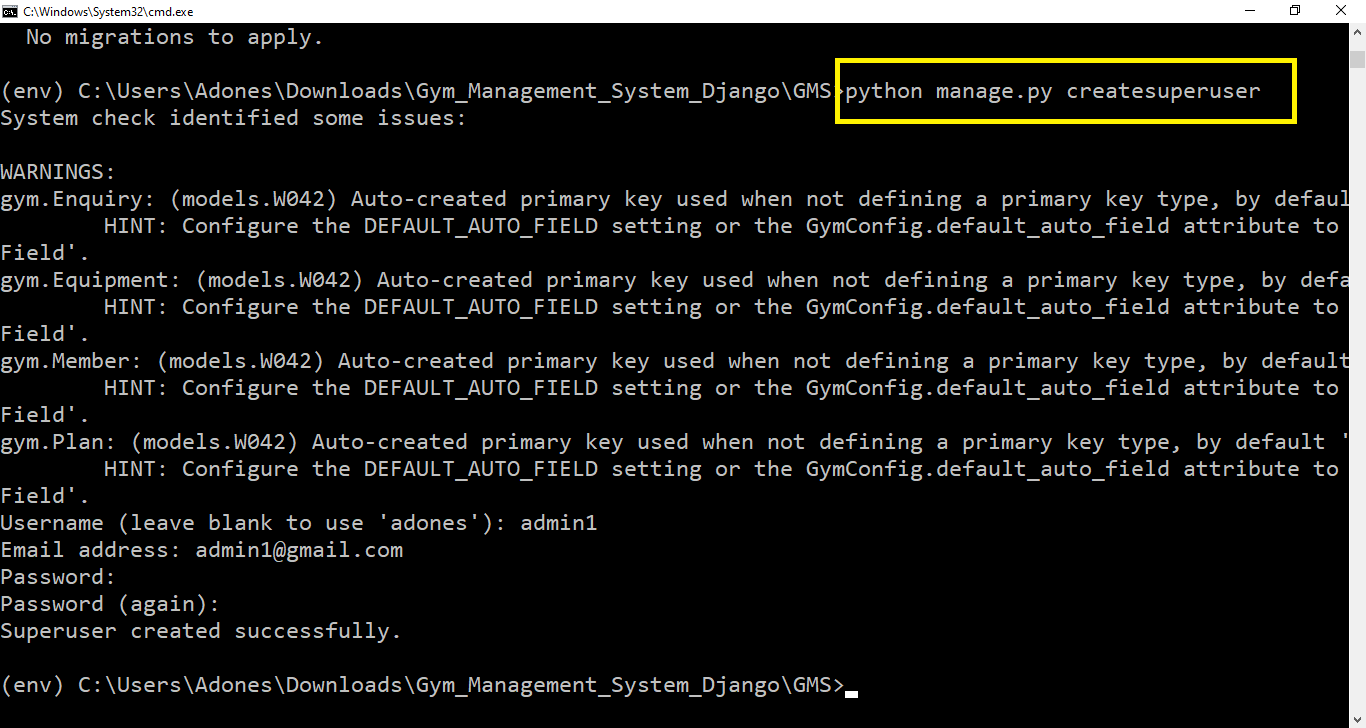
- python manage.py createsuperuser
After migration of database you need to create super user to login in the admin account, just you need is to type the command ” python manage.py createsuperuser “. Using manage.py, you may establish a “superuser” account with complete access to the site and all necessary permissions. To create the superuser, run the following script in the same directory as manage.py. You’ll be asked to create a username, email address, and a secure password.
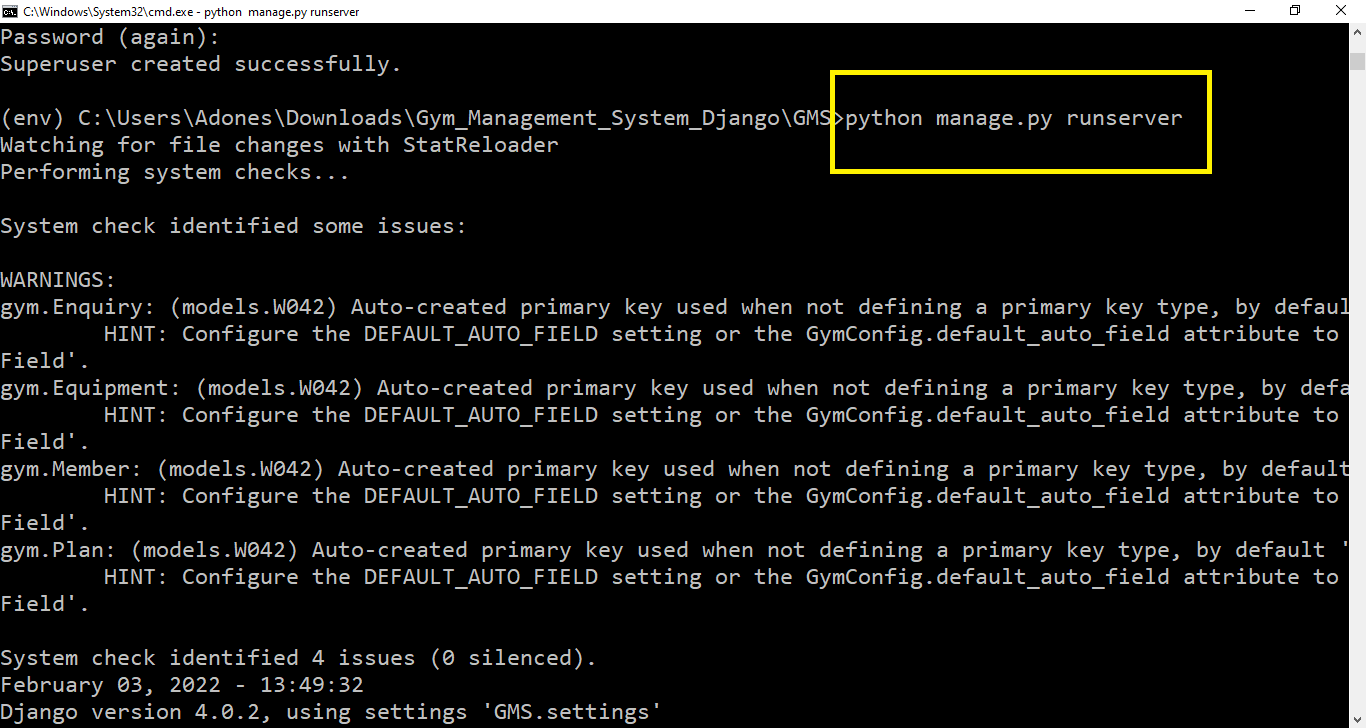
- python manage.py runserver
Lastly, after creating super user just type the command ” python manage.py runserver “. It should only be used for testing and launching your project; it should not be utilized for live website deployment. The runserver management command is designed for purposes other than running a web server. The development server automatically reloads Python code for each request as needed, which is ideal for local development but would add extra overhead in a production setting (source):
- http://127.0.0.1:8000/
Finally, To access your project dashboard, type or copy this “http://127.0.0.1:8000/” into your browser. It is possible to imitate a web-server environment with localhost, and it is most commonly used to simulate web-applications operating on a webserver. : The port number on which the browser communicates to the server is 8000.


Download Source Code Here!
Conclusion
Because the entire system needed to be maintained by hand, the process of storing, preserving, and retrieving data was extremely tedious and time-consuming.
The records were never in a systematic order. There used to be a lot of difficulties associating any particular transaction with a particular context.
If any information was to be found, it was required to go through the various registers, documents, and there was never anything like report generation.
Another issue was that it was extremely difficult to detect errors while entering the data. It was extremely difficult to amend the records once they had been submitted.
Related Articles
Inquiries
If you have any questions or suggestions about Gym Management System in Django with Source Code, please feel free to leave a comment below.
After the final command it’s showing django.db.utils.operationslError:(2002, Can’t connect to server on’127.0.0.1′(1006)”)
sir I am trying to run the code in terminal but it gives the error :-
django.core.exceptions.ImproperlyConfigured: Requested setting DEBUG, but settings are not configured. You must either define the environment variable DJANGO_SETTINGS_MODULE or call settings.configure() before accessing settings.
please give me the solutions i already added the settings.configure() to settings…
will u please help me to get out of this…