What is PHP programming language?
PHP stands for “Hypertext Preprocessor” and it is a free open-source scripting language mainly used for building dynamic and interactive web pages and can be embedded into HTML.
PHP is an object-oriented language that is easy to learn and a tool that is powerful to create dynamic and interactive Web Pages.
Databases that can be used in PHP language are:
- MySQL / PostgreSQL
- Microsoft SQL Server
- Informix
- Sybase
- Oracle
- Firebird/Interbase
- CUBRID
- SQLite3
- SQLSRV
- dBASE
- MongoDB
Things you need to do to start using PHP
To get started, you’ll need a few things to use PHP: A development environment to run your PHP in any code editor and Web Server.
- Install any Text Editor (Sublime, Notepad++, Visual Studio Code, etc.).

Install a Web Server
There are a lot of Web Servers that are used in PHP but there are two that have simple, easy, and very suitable PHP Web Servers the WAMP and XAMPP.
In addition, they are quite lightweight, so they can easily and locally host any application on Windows.
Steps to Download and Install WAMP Server:
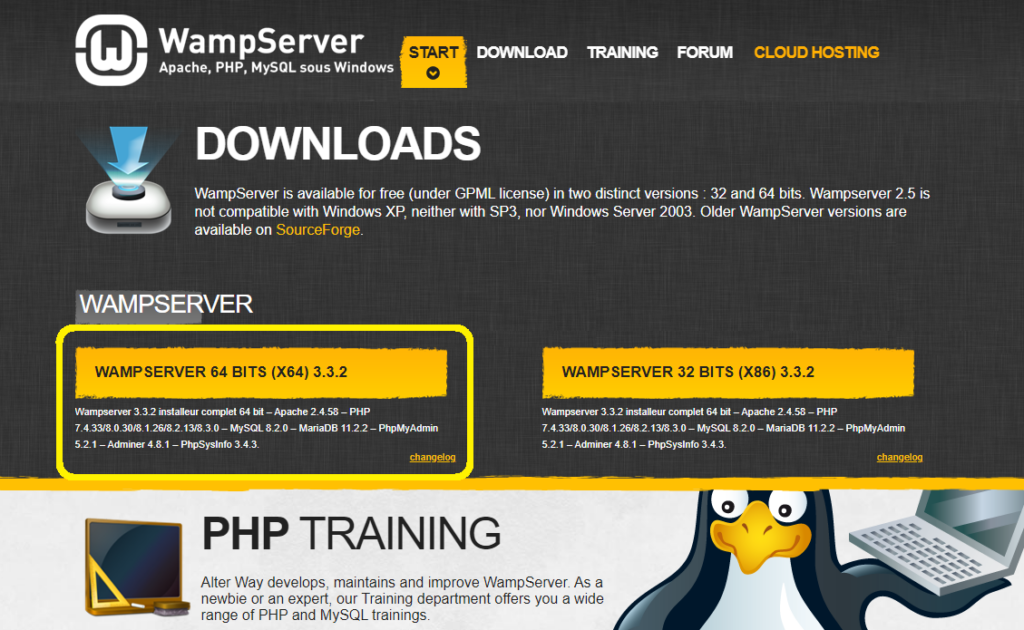
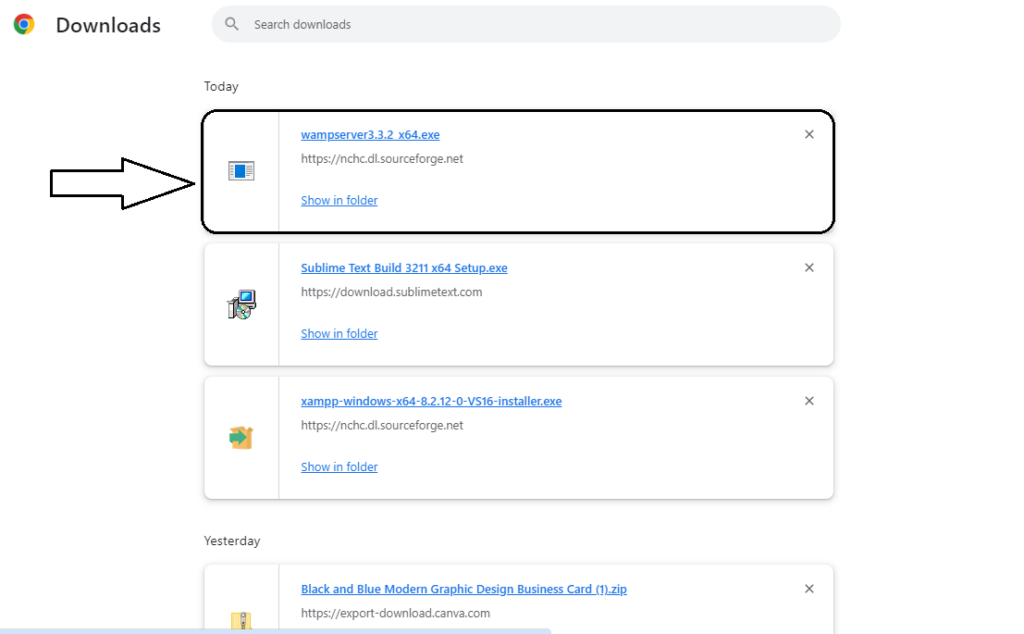
Step 1: Click this link to Download the Latest Version of the WAMP Server (https://www.wampserver.com/en/download-wampserver-64bits/#download-wrapper).
Choose a version of Wamp Server that is available i.e. 64-bits (x64) and 32-bits (x86), and select it according to your computer’s configuration.
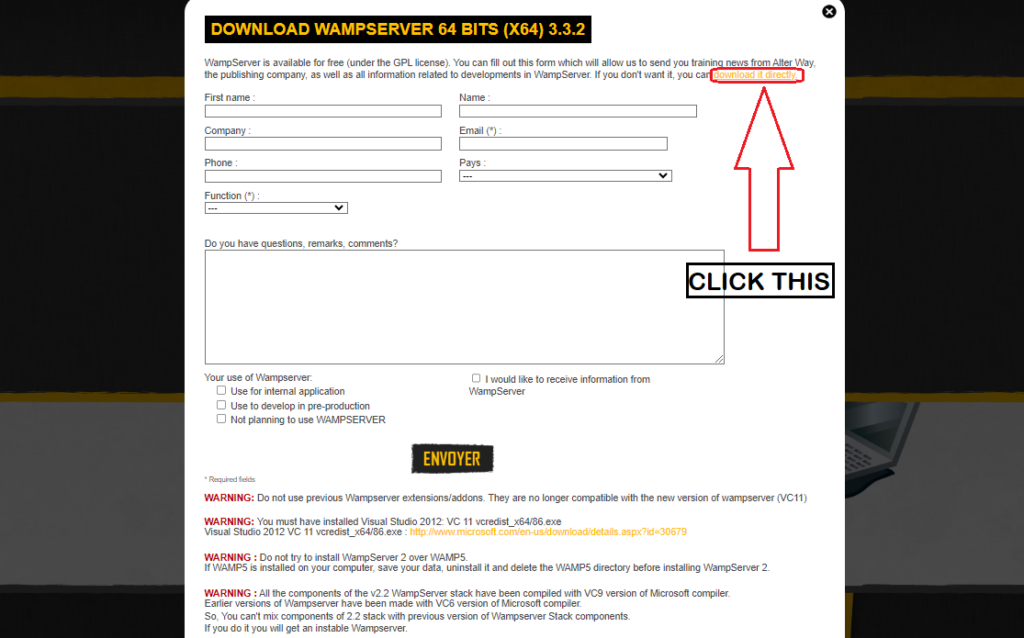
Once you click on the download option, a pop-up will appear displaying some warnings.
Do not be concerned about these warnings; instead, simply click on the “you can download it directly” link as shown below and proceed with the download process.
Step 2: Once it is downloaded completely, follow this WAMP Server Installation guide.
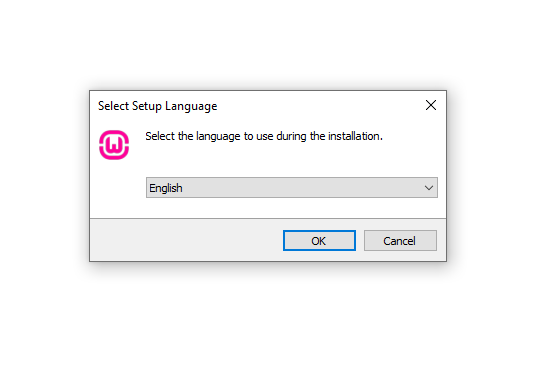
After you click the downloaded file, the WAMP Server will ask what preferred language you choose and just simply click the “OK” button.
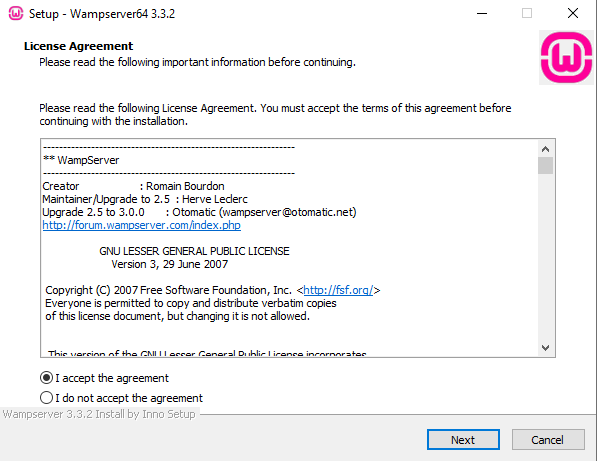
Next, Select ‘I accept the agreement” and click the “Next” button.
The following screen shows the components required for WampServer to function properly, primarily verifying that the correct version of the Microsoft VC++ redistributable package is present.
Click the “Next” button to continue.

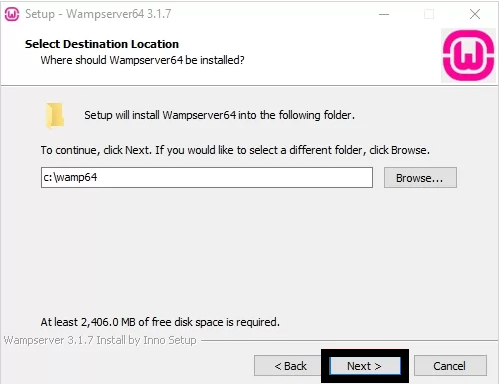
Step 3: Select Destination Location.
Select the Destination Location, where you want to install WAMP on your computer.
However, you can accept the default position and continue.
To continue the installation, click the “Next” button.
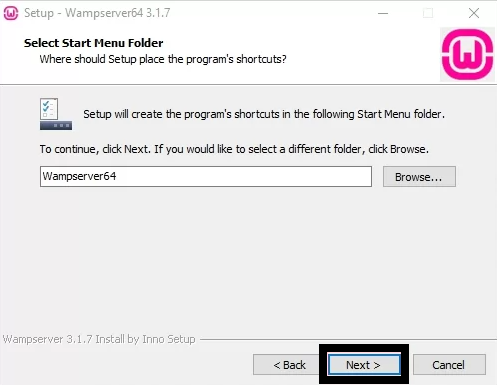
Step 4: Select Start Menu Folder.
Select any folder or go with the default option, and this folder is easily accessible via the Windows Start button.
Select a folder and click the “Next” button to continue.
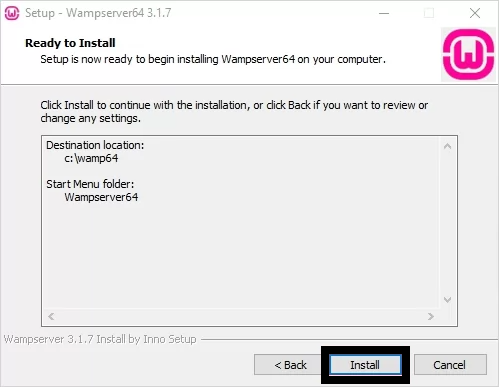
Step 5: Ready to Install WAMP.
Now, you will see an installation wizard with ready-made settings to start the installation. Click on the “Install” button to start the installation process.
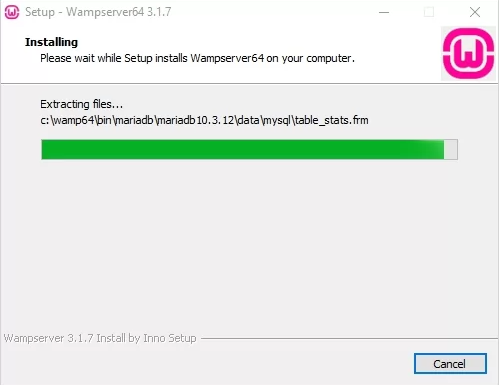
Wait for several minutes while the Wamp Server extracts the files to your chosen location. Let the process complete.
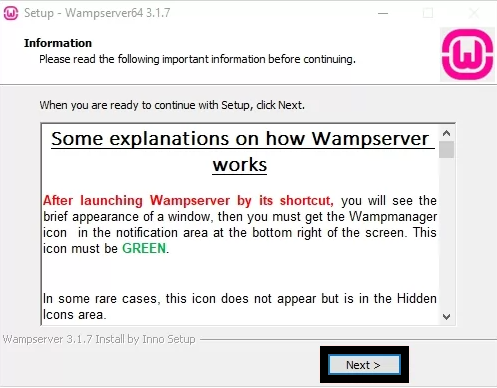
Once done installing, there’s an information screen will appear like the one shown below.
Click the “Next” button to continue.
Take Note:
During the installation process, choose your default web browser.
You can keep it in Internet Explorer or choose another one by clicking the folder icon.
Confirm your selection by clicking “Open”.
Additionally, you may need to enter SMTP and email settings. Add values or keep default values.
Then proceed by clicking “Next” to continue the installation process
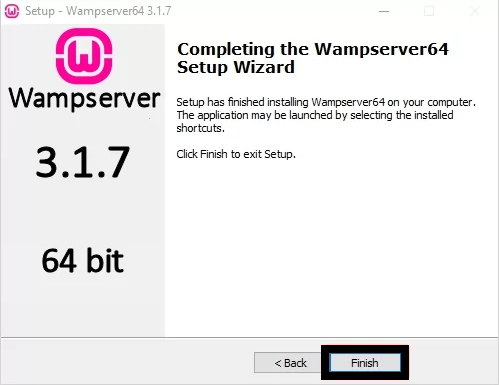
Step 6: WAMP installations complete.
When done installing, just simply click the “Finish” button to exit the setup.
That’s all. Now that you have a WAMP server, you can now use it to connect to PHP
Install PHP
Installing PHP on your development computer allows you to build and test websites and applications without impacting data or live server systems.
There are Alternative Options to Install PHP using an all-in-one Package.
These packages are available for Windows.
They include Apache, PHP, MySQL, and other useful dependencies in a single installation file.
These packages include XAMPP and WampServer.
These packages are easy to use, but may not be suitable for your active server environment.
By manually installing PHP and Apache, you will learn more about the system and configuration options.
Database in PHP
MYSQL is most commonly used in database systems in PHP, it is an open-source relational database management system (RDBMS).
MySQL database data is stored in tables. A table is a collection of related data and consists of columns and rows
Oracle Corporation developed, supported, and distributed MySQL.
PHP + MySQL Database System
It is a cross-platform and refers to the combination of the PHP programming language and the MySQL relational database management system (RDBMS).
It is commonly used in web development to create dynamic and interactive websites and web applications.
There are three ways to work with MySQL and PHP.
- MySQLi (object-oriented)
- MySQLi (procedural)
- PDO
How to configure the PHP environment?
Setting up a local PHP environment gives you greater control over your development process, facilitates debugging and testing, and allows you to work offline without relying on an internet connection.
This guide covers the essential components to create a robust PHP development environment on various operating systems, including Windows, Mac, or Linux workstations.
There are three steps to perform and configure PHP environment setup for web development:
- Text Editor:
It provides syntax highlighting and other useful features that help developers write and edit PHP code more efficiently.
You need to have a text editor where you can write and edit your PHP, HTML, and CSS codes.
You can also find a lot of text editors (Sublime, Notepad++, etc.) on the web and you may choose an editor that you like. - Local Server Installation:
This step is to have a local server installed on your computer.
There are a lot of local servers available for any operating system you have, but as for this tutorial, we recommend the XAMPP or WAMP. - Browsers:
Every PHP programmer or even beginner must require a browser to run and test the PHP codes to see the output.
Which one is best WAMP or XAMPP?
XAMPP and WAMP are different types of local development servers that are crucial in web development technology.
They replicate the environment of a real web server, so you can run your site’s code, test it thoroughly, and then proceed with deployment.
- XAMPP called “X OS, Apache, Mysql, PHP, Perl.” is an open resource platform that is easy to download and completely free.
It includes attributes such as support for Perl, Mercury Mail, Filezilla, etc.
It is cross-platform and supported by many operating systems, like Windows, macOS, and Linux.
It is supported by multiple reporting codecs that increase its reliability and it is easy to install and configure.
- WAMP called “Windows, Apache, Mysql, PHP. ”
It’s easy to download and set up.
The server has a graphical user interface that allows you to activate and deactivate individual software components during operation.
Its server offers the ability to switch between multiple versions of Apache, multiple versions of PHP, and multiple installed versions of MySQL, which provides more flexibility in development, while the XAMPP server has no such option.
The Benefits of WAMP and XAMPP.
- Both local servers are cross-platform, meaning it is available for both Windows and Linux.
- They are compatible with both 32-bit and 64-bit systems.
- You can start and stop the web server and database using a single command.
- They both constitute MySQL, PHP, and Apache servers.
Difference between Xampp and Wamp:
- XAMPP has more extension compared to WAMP.
- WAMP has no PERL packages.
- XAMPP is a cross-platform software package supported by platforms like Mac OS, Linux, and Windows, while the WAMP is only supported by the Windows operating system.
- XAMPP installation is more complicated than WAMP.
- XAMPP has the advantage of being compatible with various operating systems.
- XAMPP is that it uses more resources than WAMP. This is primarily because much of the internal component software runs in XAMPP.
- WAMP has no SSL “Secure Sockets Layer” features.
Steps to Install XAMPP to Configure PHP
To Install the XAMPP for Windows Version:
1. Click here to “XAMPP download” for Windows, Linux, and OS X:
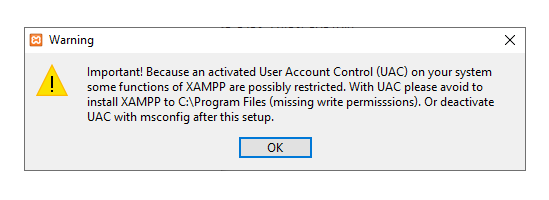
2. Once the file is completely downloaded, the next step: start the installation process and if UAC is enabled, the XAMPP installer will tell you not to install it in the Applications folder and confirm with OK.
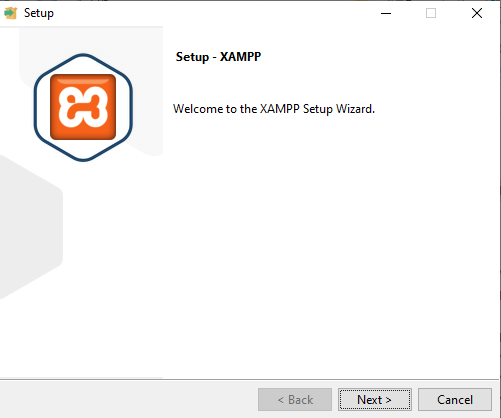
3. Click the “Next” button to proceed with the installation.
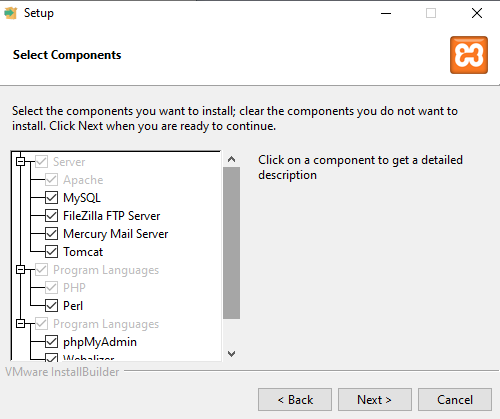
4. Select the components that you want to install, but the best option is to choose the default, and just simply click the “Next” button.
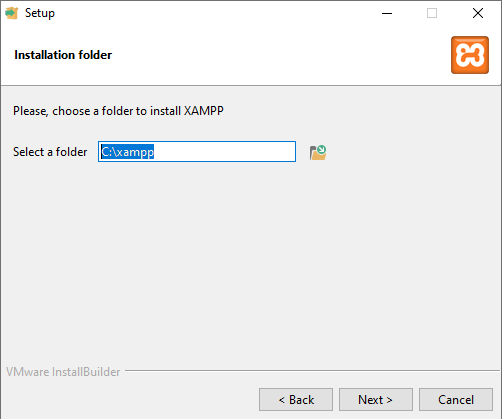
5. Select a folder to install the XAMPP and click the “Next” button.
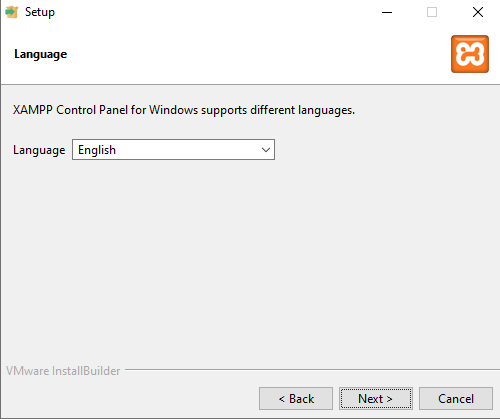
6. Set up or select a language that you want to choose and click the “Next” button.
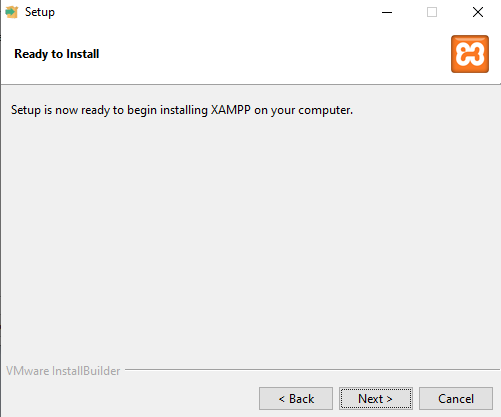
7. Once the XAMPP is ready to install, just simply click the “Next” button.
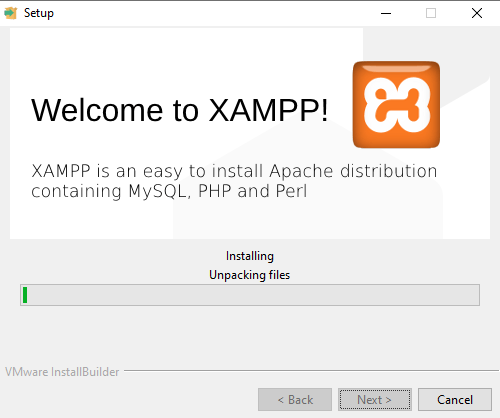
Wait for several minutes to install the XAMPP.
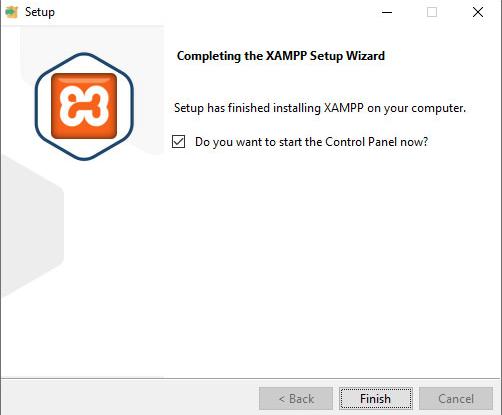
Once it is done, click the “Finish” button to launch and set the localhost.
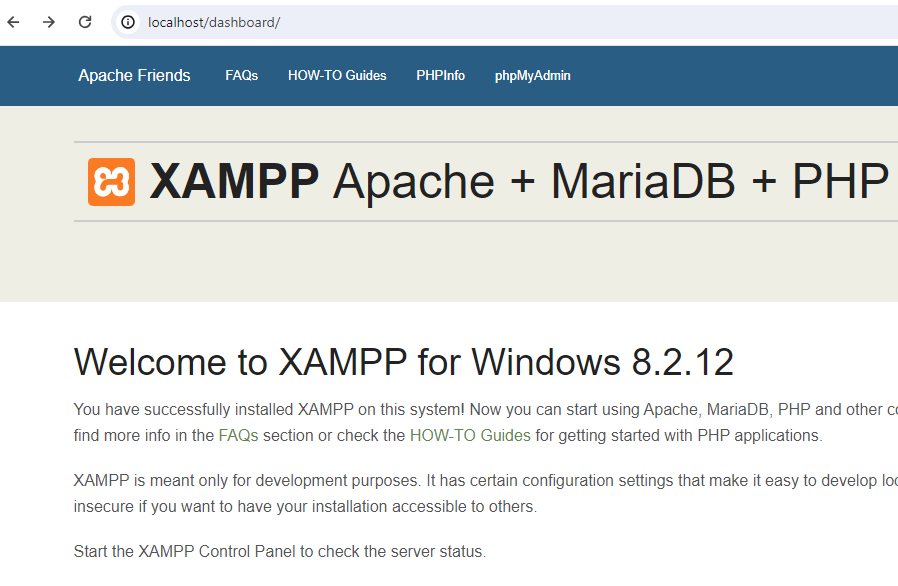
8. For the Apache module, click Start. Localhost is now ready for use. You can access Localhost by opening a browser.
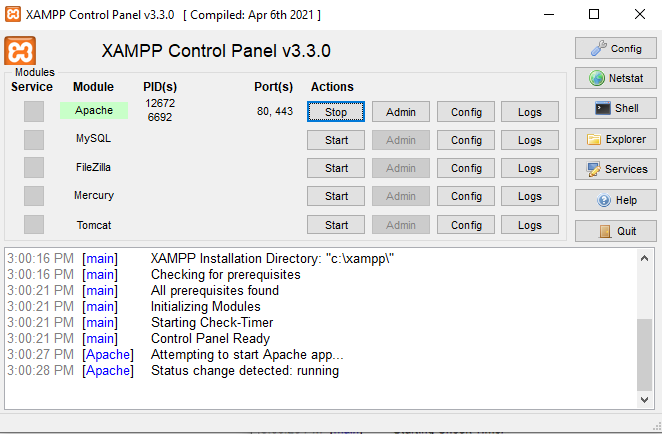
Type the http: localhost/ in the browser to check if the Apache module is working.
How to Run PHP code with XAMPP:
- First Step: Go to Local Disk (C:) and select the xampp folder.

- Second Step: Click the htdocs, this is where you can add your PHP File to run your code on Browser.
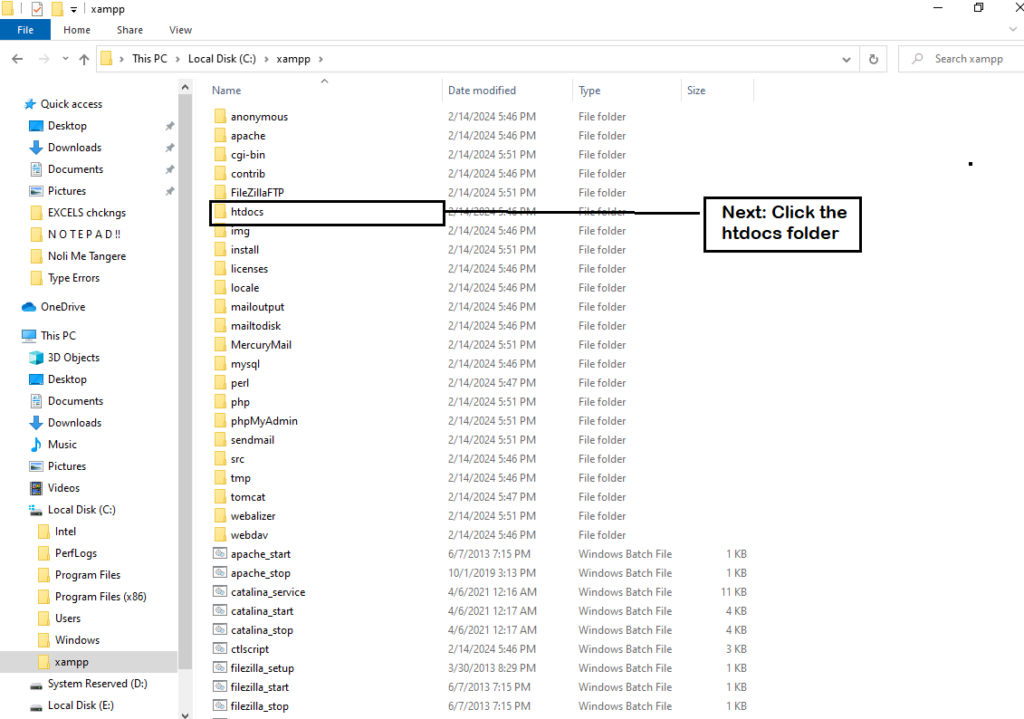
- Third Step: Create a folder on htdocs.
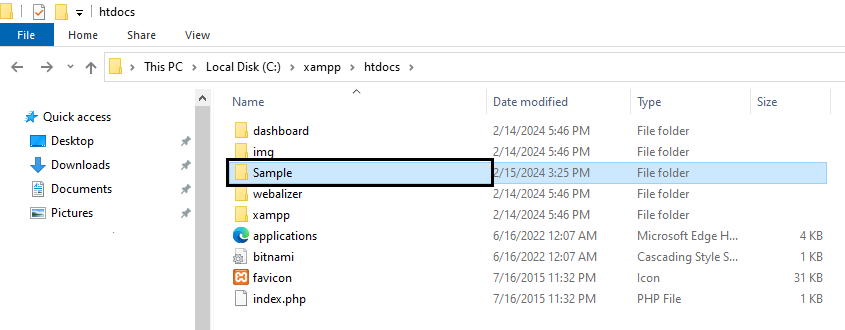
After that, create a PHP File in any Text Editor like Notepad or Notepad++, Sublime, or Visual Studio code to save it to a folder that you created “Sample“, and the file name must end on the .php “index.php“.

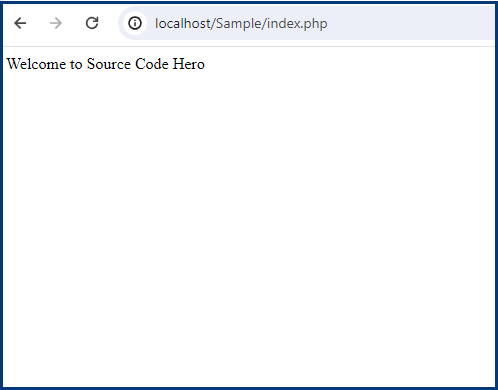
- Final Step: Type the http://localhost/Sample/index.php to run your PHP code on the browser.
Conclusion
So there you have it. You have now an idea of how to set up a PHP Development Environment.
By executing the step-by-step guide above, I can guarantee that you can set up your PHP Environment smoothly.
I hope this tutorial article will learn a lot and give you the interest to start coding using PHP and XAMPP.
Thank you and Enjoy Coding!!